If you’re like me, you like to be able to write unit tests for logic in your code. Unfortunately, Unity has historically not had great support for unit testing in the form that most programmers are used to - however recently, they are adding more and more support tor automated test.
Tonight I spent a fair bit of time figuring out how to write simple NUnit tests for my code in Unity, and now that I’ve figured it out, I wanted to share my findings!
Step 1: Create a Test Assembly
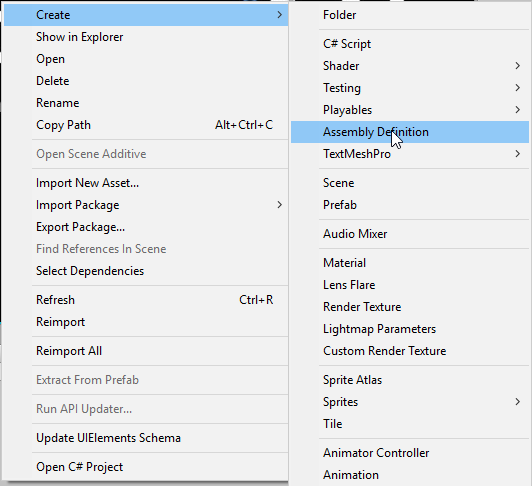
First, in your Scripts folder, right-click and add a Tests Assembly Folder:

You can name it anything you like. Under the covers, Unity manages C# projects for you, rather than using traditional .csproj files that most .NET developers are used to. These assemblies are managed using Assembly Definition (.asmdef) files - when we created our Tests Assembly Folder, Unity created an assembly definition for us.
Step 2: Configure our test assembly for Editor mode
Let’s navigate to the new folder and check out the assembly definition by clicking on it:
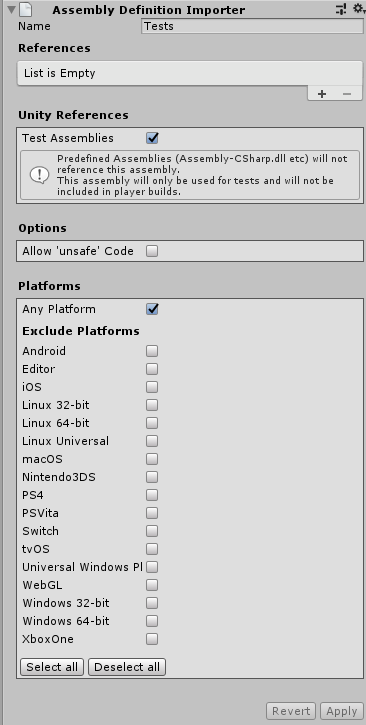
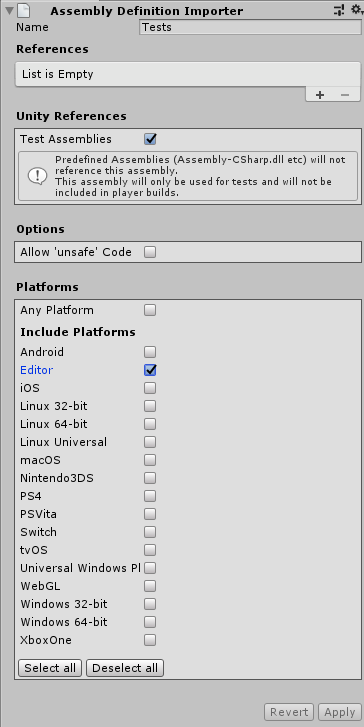
Now what we want to do is configure this assembly to use the Editor platform. For programmers used to old fashioned coded unit tests, this will be the most similar to what you’re used to. The other platforms allow you to design Play Mode tests which won’t be covered here. To change this, we can just select the Editor platform, then hit Apply:
Step 3: Create your test script
In the new Test folder, right-click and create a new C# Test Script:

This will create a test script for you with a couple of test methods using Unity’s UnityEngine.TestTools assembly, which is based on NUnit.
Step 4: Run our tests
Open the Test Runner (Window > General > Test Runner) and then select EditMode. here we will see the DLL generated from our Test Assembly definition, along with the tests inside of it:
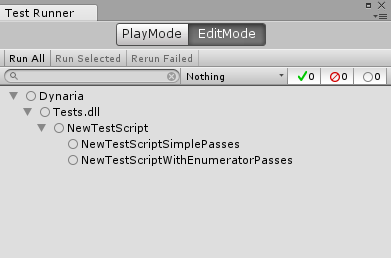
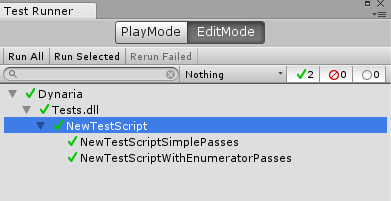
Simply right-click and Run anywhere in the assembly hierarchy to run the tests:
Step 5: Create an Assembly Definition for your regular game code
Okay, so now we have tests, and we can run them. Awesome! But there’s a big gotcha - our test assembly is generated by Unity dynamically, meaning we can’t add an assembly reference to our code! If we try, then we will just get console errors when we try to run them in the Test Runner saying that our namespaces are not found.
To get around this, we can create another Assembly Definition for our main game code, then reference it in our test Assembly Definition. Let’s do this in our Scripts folder:
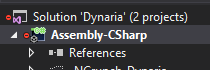
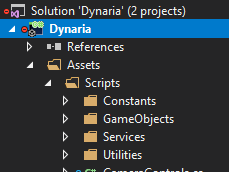
We can name this anything we want. Once we do this, if you reload your solution in Visual Studio, you will notice that your Assembly-CSharp project has been renamed to match our new Assembly Definition:
Before…
After.
Step 6: Reference our main game code Assembly from the test Assembly
Now let’s go back to our test assembly definition, and add a reference to it:

Select your Assembly from the list, then click Apply.
Step 7: reference your game code in your tests!
Now the test Assembly generated by Unity will have a reference to the Assembly containing our main game code. So now we can simply reference our code normally. To demonstrate this, we can define a really simple class in our game code assembly:

Then let’s go and edit our test to reference it:

Once we add a using statement to import our namespace, we can reference our game code directly in tests. Now simply run your test again in the unity Test Runner!
Next Steps:
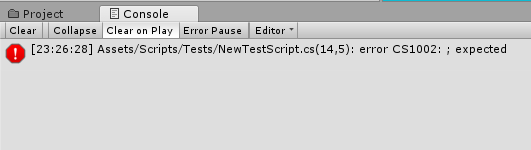
Now that we have some unit tests in Unity, there’s a few new things to know. First, when the Test Runner builds your solution in the background, it will not display errors directly in the Test Runner. You’ll have to look for these errors in the Unity Console:
Second, it can often be useful to debug through our test code while it’s running - to do so, simply attach to Unity, then run your test(s) via the Unity Test Runner, and you will be able to hit breakpoints and step through your code.

And that’s it! For those of you like me who have a background in using coded tests to make sure your code keeps working long after it’s written, I hope this helps you adapt your testing habits to the Unity world! Happy coding!